

Deploy to Cloudflare Pages
Create an API token
Section titled “Create an API token”Swebsy needs a key that lets it upload to Cloudflare Pages and read your account ID — nothing else.
In Swebsy, click How to get a token, then the Cloudflare API tokens link. It opens Cloudflare’s token form already filled in with two permissions: Cloudflare Pages set to Edit, and Account Settings set to Read (so Swebsy can fill in your Account ID).
- Click Continue to summary, then Create Token.
- Copy the token. Cloudflare shows it only once.
One-time setup in Swebsy
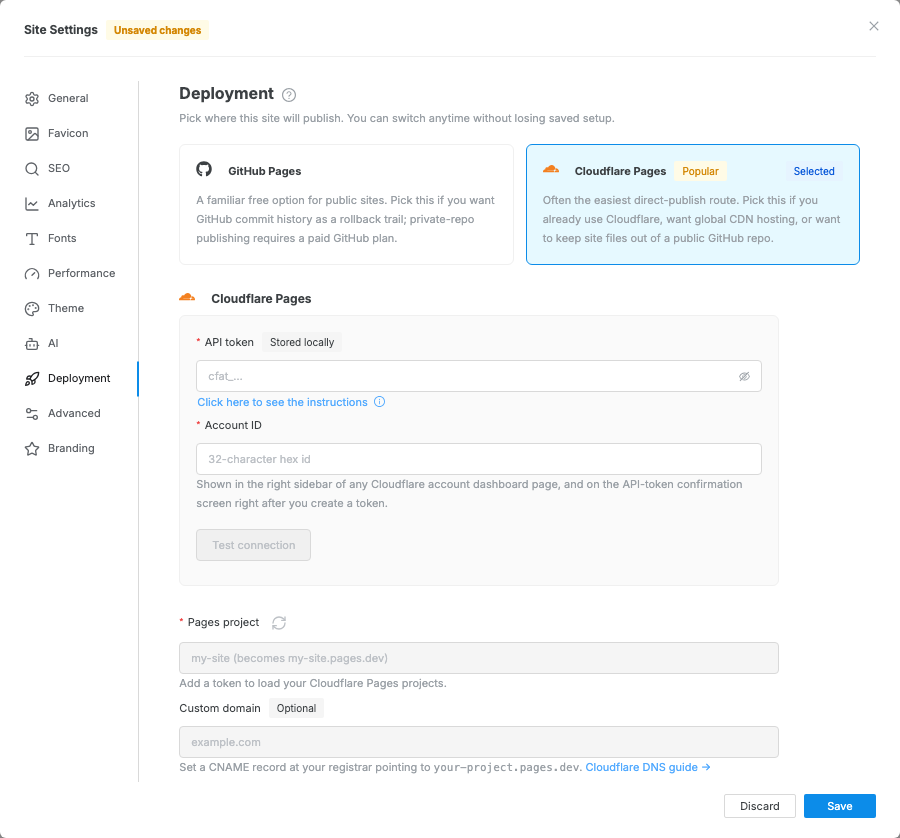
Section titled “One-time setup in Swebsy”Click Publish at the right of the topbar and choose Cloudflare Pages — until it is set up, that opens its setup in Settings → Deployment.
Paste your API token. Swebsy fills in your Account ID from it — if the token reaches several accounts, pick one from the list. If it stays empty, paste the 32-character code from your Cloudflare dashboard’s address,
dash.cloudflare.com/<Account ID>/…. Swebsy checks the connection as soon as both are in.Pick a Pages project from the list, or type a new name and choose Create in the list (or click Create project under the field). Swebsy shows the address Cloudflare gives it, such as
https://my-site.pages.dev— Cloudflare adds a short suffix when the name is taken elsewhere. If the project already has a live site, Swebsy says that publishing replaces it.- Optionally enter a custom domain.
Click Deploy now to publish straight away, or Save. If the connection check failed, Save still saves, and says publishing won’t work until it’s fixed.
Deploy
Section titled “Deploy”- Click Publish at the right of the topbar.
If Cloudflare Pages is the site’s host, click Publish on its card at the top of the menu: it publishes straight away. Otherwise click Cloudflare Pages in the list below it.
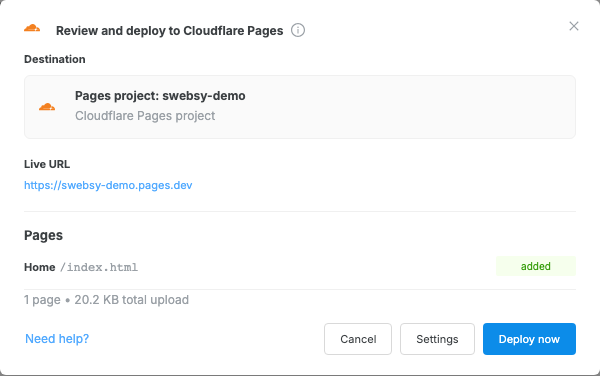
From the list, or when there is a warning, the Deploy review modal opens, showing the target project, live URL, pages, upload size, and any warnings.
- Click Publish now.

Custom domain
Section titled “Custom domain”If you entered a custom domain, Swebsy adds it to the Pages project when you
publish. Then add a CNAME record for the domain pointing to the project’s
address (Swebsy shows it under the field, such as my-site.pages.dev), wherever
the domain’s DNS is managed — Cloudflare DNS or your registrar.
Token rejected — your token may have expired, been revoked, or lack the Cloudflare Pages → Edit permission. The Publish menu then shows Token rejected with a Fix in settings button, which opens the token’s Replace. Create a new token from How to get a token and paste it there.
Project not found — open Settings → Deployment (the failed publish has an Open Cloudflare Pages settings button), then pick a project or click Create project.
Large site times out — very large sites (>50 pages, many images) may hit Cloudflare’s Direct Upload limits. Try reducing image sizes before deploying.
Single file upload fails — Cloudflare Pages rejects individual site assets larger than 25 MiB. Compress the file or host it outside the Pages deploy.